Dialogflow for Natural Language Processing
6 minutes read
Advanced
Dialog Flow can be used in flows to send responses to end-users based on their intent when a specific keyword doesn’t match.
Video Tutorial
The UI of the platform has been updated since the webinar was conducted. The functionalities shown all remain the same
Using DialogFlow NLP agent within Glific.
Step 1 : Open a GCP account, project and service account with a key (.json file).
Step 2 : Connect your Glific instance with this project by adding contents of its key file as GOTH credentials for Glific.
Step 3 : Open a DialogFlow Account and create an NLP agent that links to the project created in Step 1.
Step 4 : Create some intents within your agent. You can do so by creating an intent from scratch OR by creating a KnowledgeBase from a set of FAQs
Step 5 : Create a flow in Glific that accepts a message from the user , maps it to an intent and delivers the response (as computed by the agent ) to the user.
Below are details on each of these steps.
Step 1 : GCP Account and project
Refer to the DialogFlow Quick start guide - https://cloud.google.com/dialogflow/es/docs/quick/setup - and execute the following steps before you configure Glific
- Create a project
- Enable Billing
- Enable the API
- Set up Authentication (till you download the private key file.) You will use the content of this key file to set up your GOTH credentials in Glific.
Dialog Flow can be used in flows to send responses to end-users based on their intent when a specific keyword doesn’t match.
Step 3 : Open your DialogFlow account and create an Dialog flow agent connected with the project from step one.
-
Log in with your gmail id
-
Click on " Create Agent"
-
Choose Import an existing Project (You should be able to see your project from step 1 if you are in the same browser window)
Step 4 : Create some intents within your Dialog flow agent.
1 . Create an intent
1 . Go to Google Dialog flow https://dialogflow.cloud.google.com/
2 . Click on Create intentbutton

3 . Enter the name of the intent.

4 . Enter the phrases you can expect user will send to BOT. Enter one phrase and hit enter to add it in the phrases list.

5 . Click on Save button.

6 . It will be changed to Done after successful save

7 . Click on setting icon on top of the screen

8 . Click on ML Settings and then click on Train button.

9 . Click on Save button.

10 . After saving, click on intents menu.
11 . To test type any phrase entered earlier in the try it now section and hit enter.

12 . It will show the intent name matched to your phrase

13 . Click on Diagnostic info button at the bottom of the section. It will open an API response. Search for Confidence in the text to find the confidence level of the response match to the phrase. Confidence level 1 is the highest level. Any thing above .75 is good matches to the phrase

14 . Click on Close button. You are ready to use NLP in your flow.
NOTE : You can also create an intent by creating a Knowledge Base. This basically is a collection of FAQs that can be split across multiple documents.
a. Since this is a beta feature you will need to enable Beta features and API in your agent settings - under the General Tab.
b. Once done you will be able to create a Knowledge Base. Follow the instructions to point DialogFlow to your FAQ document(s)
c. Each knowledgebase is mapped to an auto-generated intent. You can test the knowledge base just like to test any intent. Ask a question from your FAQ and the agent should respond with corresponding answer.
Troubleshooting tip : Added a new intent in Dialog Flow agent does not reflect in Glific split by intent dropdown ? IN settings open Dialogflow settings and just hit save without making a change.
Step 2 : Configure Dialog Flow in Glific to connect to your GCP Project
1 . Click on NGO main account, find Settings and go to Dialogflow.
3 . Enter Goth Credentials of your Dialog flow. It is same as it is for your GCS account. Check the "Is active" box as well.
4 . Click on Save button
Give Google account Dialog flow access permissions
Note : This is only needed if your service account doesn't have complete owner privilege.
1 . Go to https://console.cloud.google.com/
2 . Click on IAM menu from left menu list.

3 . Click on members button.
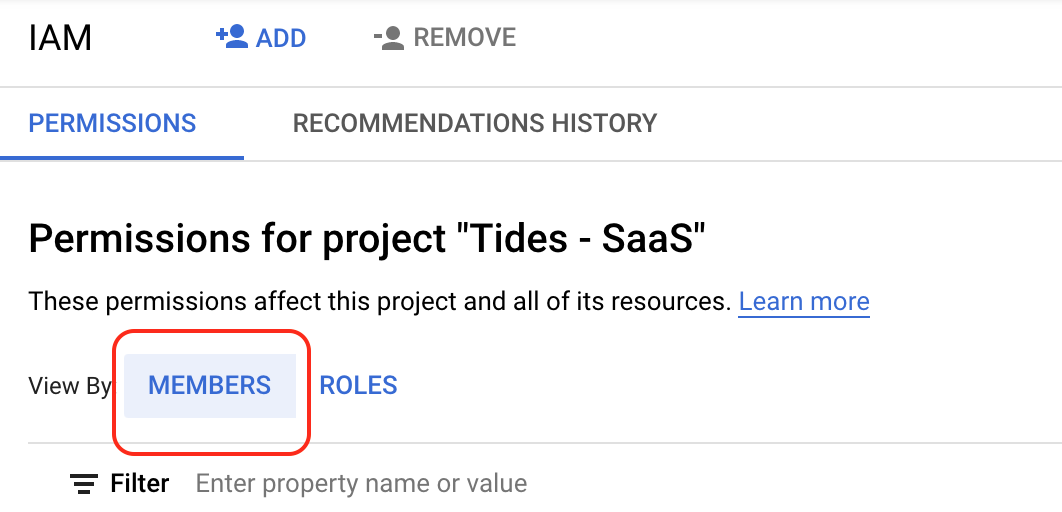
4 . Scroll down to the account you are using to link with Glific and check if user is having Dialog flow access permission. If not then click on edit icon next to the account permission section.

5 . Click on +ADD ANOTHER ROLE link.
6 . From the dropdown search and select Dialogflow API Admin and Dialogflow Console Agent Editor role.

7 . Click on Save button at the bottom.

Step 5 : Create a flow in Glific that uses your DialogFlow Agent
1 . Create a new Flow, or edit any existing flow.
2 . Use Wait for response action type to receive the intent phrase input from user.

3 . Next linked node will be Split by intent

4 . Select Dialog flow from the 2nd drop down.
5 . Fill the details of your intent.
a) select has top intent
b) select your intent name created in dialog flow.
c) Enter the confidence level. (Enter the confidence you have got in intent to match it exactly with the phrase. or enter .5 for now)
d) Enter category of the intent Ex. intent name
e) Enter the variable name to receive the input in Result Name section

6 . Click ok to save.
7 . You will get the nlp response, nlp confidence and nlp intent to use in your flow. syntax are
Response: @results.df_intent.response
Confidence: @results.df_intent.confidence
Intent: @results.df_intent.intent

Flow Sample

Flow Results
Success case

No Match found case
